Skip to content

Category: Media Server

Fix sonarr “Unable to communicate with SkyHook.”

Today I set up sonarr on my TrueNAS machine. I thought it will just work as same as my radarr instance, but end up I get the following error when I try to add new series: Unable to communicate with SkyHook.

I tried to google it but seems like not many people are facing the same issue as me. Luckily I found a discussion on TrueNAS forum, and it leads me to some clues: https://www.truenas.com/community/threads/sonarr-radarr-probably-other-arr-jails-unable-to-verify-ssl-certificates-after-latest-update.96008/

According to the post, this is a known issue that FreeBSD’s Mono 6.8 package is missing its root CA store. What we going to do is manually download the root CA and sync it to the jail.

And following is my solution:

# get into the shell of the jail
# 5 is my sonarr jail ID
# if you don't know your jail ID, run `jls`
jexec 5 sh

# install the useful wget command in order to download file
pkg install wget

# download the root CA and pipe it to cert-sync
wget -O - https://curl.haxx.se/ca/cacert.pem | cert-sync --user /dev/stdin

# until this stage, you need to exit the jail and stop it. #

# execute following command on your TrueNAS shell. (NOT jail shell)
cp -R /mnt/main-pool/iocage/jails/sonarr/root/root/.config/.mono/ /mnt/main-pool/iocage/releases/12.2-RELEASE/root/usr/share/.mono

Notes for the last command:
1. replace main-pool with your pool’s name.
2. replace sonarr with your jail’s name.
3. replace 12.2-RELEASE with the FreeBSD release that your jail using.

That’s all. Restart your sonarr jail and try to add new series again, it should work now.

Leave a Comment
Setup AdGuardHome on TrueNAS

Recently I found a good replacement for PiHole call AdGuardHome.

PiHole is good, but it requires at least 1 Raspberry Pi running. It might be a problem if you are out of the electric socket or you don’t have enough LAN port from your router.

For me, it’s a good replacement for PiHole is because:
– I already have a TrueNAS server running on a LAN cable in my home network. Installing AdGuardHome on it doesn’t require any additional socket or space.
– I think my TrueNAS spec should have better performance than Raspberry Pi 4. Don’t plan to waste it. =P

Here’s how I setup AdGuardHome on my TrueNAS:

# create a jail
iocage create -n AdGuardHome --release 12.2-RELEASE

# you might want to configure your jail network in your web GUI!

# access into the newly created jail console
iocage console AdGuardHome

# run the installation script from AdGuardHome github repo
# you can check it here: https://github.com/AdguardTeam/AdGuardHome#automated-install-linux-and-mac
curl -s -S -L https://raw.githubusercontent.com/AdguardTeam/AdGuardHome/master/scripts/install.sh | sh -s -- -v

# done!
# note: AdGuardHome web portal always run on port 3000
# you can access to your AdGuardHome web portal by using the network IP u set earlier.
# for example: http://192.168.0.xxx:3000

After AdGuardHome is installed, make sure you update your router’s primary DNS setting OR your DHCP server’s primary DNS which allows your clients to start sending DNS queries to AdGuardHome.

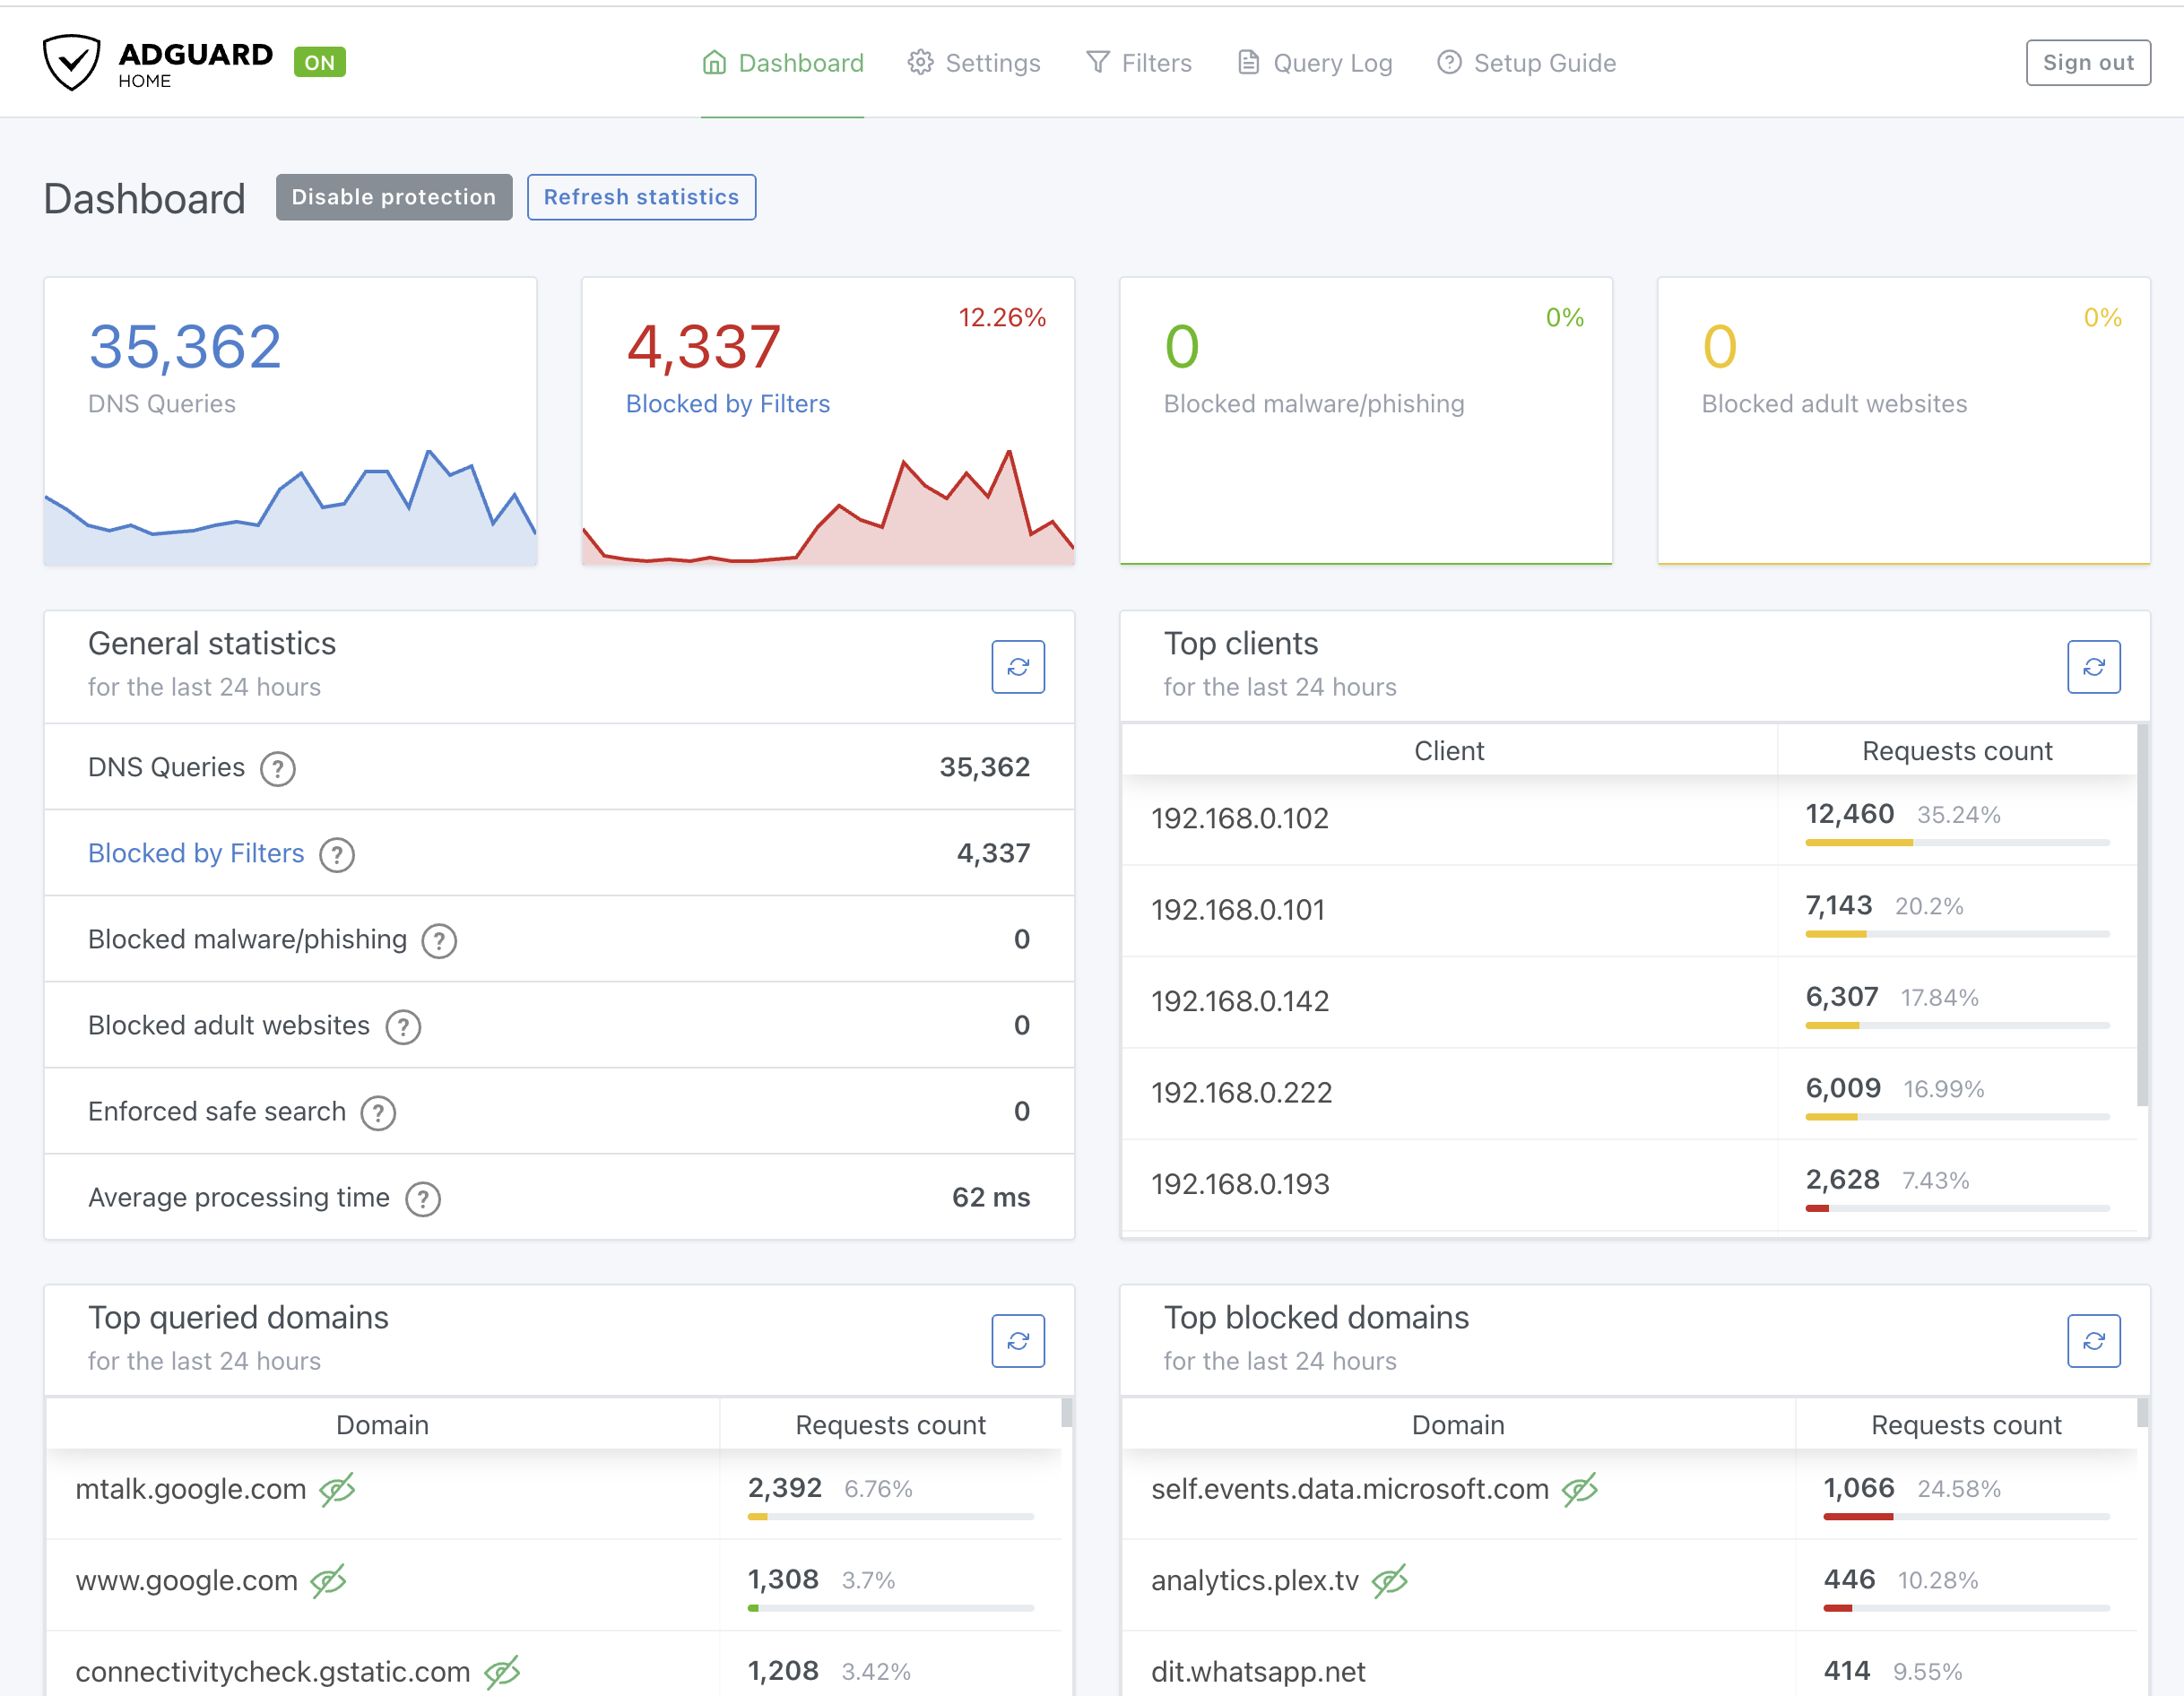
Once your installation and configuration success, you may see the statistic like this on your AdGuardHome web portal! =D

2 Comments

My TrueNAS setup

I own my very first NAS about 10 years ago – Synology DS110J, a very entry-level NAS for a beginner like me at that time. No hassle setup, basically everything just plug-and-use.
I have learned a lot of things from the whole experience: Networking, SMB, FTP, basic shell, multimedia streaming, and so on. And it did bring a lot of joy to me, which let me feel I’m really good at these IT technologies. Slowly… I continue to learn more and more from my life and career. I will say it’s one of my learning motivations actually.

After years of using Synology DS110J (around 2015), I felt it’s insufficient for me in terms of storage and the customization I want for my home media server setup. And most importantly is that I have some extra money to spend that time. =D

Basically, I purchased all components (CPU, motherboard, RAM, and hard disk) and assemble them myself. In the beginning, I choose to run Ubuntu Server on it, which I was already familiar with during my learning journey. But after a few weeks of using it, I felt it was not something that I want. After that, I did some researches. And finally, I found FreeNAS (something new for me to learn that time=D).

Indeed, jumping to FreeNAS at that time was a bit challenging for me. Because both Linux and FreeBSD sound identical, but technically they are totally different things. I did a few fatal mistakes that cause my whole setup to not be secured and put my files at risk of data loss.

But the good thing is: I did improve a lot again from the entire experience. I’m able to use FreeNAS to set up my home media server that I what. And I truly enjoy having it in my life. =)

Until now, I’m using TrueNAS (you can think it’s renamed from FreeNAS) as my primary NAS storage in my home network. I did the “upgrade” recently, that’s why I planned to write a post which to share my setup.

Basically, the purposes of this TrueNAS in my house:
1. Plex: service to stream my movies
2. Transmission: torrent downloader
3. Nextcloud: sharing my files with friends
4. WordPress backup: with UpdraftPlus S3 support.
5. Mac timemachine: dedicated backup storage for my mac.
6. AdGuardHome: replacement for PiHole. I found it recently.

Soon, I’ll slowly share the setup for the individual service running in my TrueNAS instance here. Stay tuned. =)

Leave a Comment

Fix Nextcloud login form Content Security Policy issue

I get the following error when my Nextcloud instance is hosted on a FreeNAS machine and it’s behind Nginx reverse proxy.

Refused to send form data to ‘http://cloud.example.com/’ because it violates the following Content Security Policy directive: “form-action ‘self’ cloud.example.com”.

It’s because the host is enabled with HTTPS, but the Nextcloud instance is running as HTTP behind the reverse proxy, thus Nextcloud itself doesn’t know it should run as HTTPS.

Solution

We can add the following line into config/config.php:

  'overwriteprotocol' => 'https',

Basically, it tells Nextcloud to run the instance as HTTPS. It perfectly resolved the problem, instead of struggling with the Nginx Content Security Policy directive.

My setup info

FreeNAS version: FreeNAS-11.3-U1
Nextcloud version: 21.0.2

Nextcloud directory path in FreeNAS jail: /usr/local/www/nextcloud

Reference

  • https://github.com/nextcloud/server/issues/17409#issuecomment-538684976
  • https://content-security-policy.com/
Leave a Comment

How to install Netflix on Unifi Plus Box

Until the date of writing this post, Unifi users are still not able to install Netflix on Unifi Plus Box.

It’s because the official Netflix app itself will verify the machine when it launch.

But if you insist to have Netflix installed on your Unifi Plus Box, you can still install a modded Netflix app through an APK file.

Disclaimer: Do this at your own risk! I’m not the owner of the modded APK and I don’t take any responsibility. Stop here if you having concerns!

You can get the modded APK from this XDA forum post:
https://forum.xda-developers.com/t/v7-aidans-rom-s905x-atv-9-no-lag-bloat-1-2gb-2021-update-tv-netflix.4191157/

How to install:

Option 1: Copy the APK file into a USB drive, and then install it via file manager.

Option 2: Install it through network with adb command.

# connect your machine first, make sure ur device allow the access.
adb connect 192.168.1.XXX

# install the .apk file
adb install /path/to/apk-file

Conclusion

I have been using it for months already, everything looks ok.
If you afraid before installing it, you can scan the APK on MetaDefener OR VirusTotal OR any other online virus scanner platform.


Leave a Comment